Kamis, 06 Januari 2011

Lab 4.4.4 Investigating Video Traffic Impact on a Network


Step 1: Cable and configure the network
a. Connect and configure the devices in accordance with the given topology and configuration.
1)
2)
Set clock rate on the serial link to 56000.
Routing will have to be configured across the serial WAN link to establish data communications.

Step 2: Observe data traffic
In this step, you will generate concurrent data traffic and observe the time the flows take.
a. From Host1 command line, issue the command ping 172.17.1 1 –n 500 to generate a large number of pings to Discovery Server.
b. While the pings are being generated on Host1, launch a web browser and enter the URL http://server.discovery.ccna or http://172.17.1.1 to access the web services configured on the server.
c. Use FTP to download a file. On Host1, launch a new web browser window and enter the URL ftp://server.discovery.ccna, or issue ftp server.discovery.ccna from the command line. If DNS is not configured, the IP address 172.17.1.1 must be used instead of the domain name.
d. Download a large file from the server; for example, the Thunderbird setup program file.
Note the total time taken to complete the pings, access the web page, and download the file.
Step 3: Stream the video file
Before beginning to stream the video ensure that QuickTime Player is installed on Host1, and that the video streaming service has been enabled on Discovery Server. See your instructor for advice if you are unsure. Launch QuickTime Player. Under File menu, go toOpen URL
Enter URL rtsp://172.17.1.1/MWO.sdp, or a URL as provided by the instructor.
Note rate at which it plays back and the video and sound quality.
Video Quality
Sound Quality

Step 4: Observe both video and data traffic
a. From Host1 command line, issue the command ping 172.17.1 1 –n 500 to generate a large number of pings to Discovery Server.
b. While the pings are being generated, use QuickTime Player to access the streaming video URL again.
c. While the video is being played, launch a new web browser window on Host1 and enter the URL http://server.discovery.ccna or http://172.17.1.1 to access the web services configured on the server.
d. On Host1, launch another web browser window and enter the URLftp://server.discovery.ccna, or issue ftp server.discovery.ccna from the command line. If DNS is not configured, the IP address 172.17.1.1 must be used instead of the domain name.
e. Download a large file from the server; for example, the Thunderbird setup program file.
Note the total time taken to complete the pings, access the web page, and download the file.
Note rate at which it plays back and the video and sound quality.
Video Quality
Sound Quality

Step 5: Observe the data flows with a different serial link clock rate
a. Change the serial link clock rate to 250000 on the router with the DCE interface.
b. Repeat Step 4 and record your observations.
Note the total time taken to complete the pings, access the web page, and download the file.
Note rate at which it plays back and the video and sound quality.
Video Quality
Sound Quality
c. Change the serial link clock rate to 2000000 on the router with the DCE interface.
d. Repeat Step 4 and record your observations.
Note the total time taken to complete the pings, access the web page, and download the file.
Note rate at which it plays back and the video and sound quality.
Video Quality
Sound Quality
Instructor Note: The Cisco 1841 router with WIC 2T Serial interfaces can support clock rates up to 4 000 0000 bits per second (4Mbps); other platforms and WIC 2A/S Serial interfaces may have a lower maximum clock rate.

Step 6: Record your general observations
Compare the different download times and video quality.

Step 7: Clean up
Erase the configurations and reload the routers and switches. Disconnect and store the cabling. For PC hosts that are normally connected to other networks (such as the school LAN or to the Internet), reconnect the appropriate cabling and restore the TCP/IP settings.

Step 8: Reflection
Consider and discuss how video and other data traffic can share network resources while maintaining
acceptable performance.
Video dan lalu lintas data dapat berbagi sumber daya jaringan yang sama jika bandwidth yang memadai tersedia atau jika lalu lintas yang diprioritaskan. Data lalu lintas dapat ditunda sedikit untuk memungkinkan lebih banyak waktu trafik video sensitif untuk memanfaatkan bandwidth yang tersedia.

Lab 4.3.4 Exploring Network QoS


Step 1: Cable and configure the network
a. Connect and configure the devices in accordance with the given topology and configuration.
1)
2)
Routing will have to be configured across the serial WAN link to establish data communications.
Configure Telnet access on each router.
b. Ping between Host1 and Discovery Server to confirm network connectivity.
1) Confirm Application Layer connectivity by telnetting from R2 to R1.
2) Troubleshoot and establish connectivity if the pings or Telnet fail.
c. After confirming the initial configurations, maintain a console terminal session connection with R2.

Step 2: Examine priority queue commands Configuring Priority Queueing
Configuring priority queueing (PQ) has two required steps and an optional third step:
1. Define the priority list (Required)
2. Assign the priority list to an Interface (Required)
3. Monitor priority queueing lists (Optional)
A priority list contains the definitions for a set of priority queues. The priority list specifies which queue a
packet will be placed in and, optionally, the maximum length of the different queues. To perform queueing
using a priority list, you must assign the list to an interface. The same priority list can be applied to multiple interfaces. Alternatively, you can create many different priority policies to apply to different interfaces.
Defining the Priority List
The priority list is defined by:
1. Assigning packets to priority queues
2. Specifying the maximum size of the priority queues (Optional)
Packets are assigned to priority queues based on the protocol type and the interface where the packets enter the router. The priority-list commands are read in order of appearance until a matching protocol or interface type is found. When a match is found, the packet is assigned to the appropriate queue and the search ends. Packets that do not match other assignment rules are assigned to the default queue. The following global configuration mode commands are used to specify in which queue a packet is placed. The command format is priority-list list-number Use a list-number of and note the options available.
a. Enter the following command and note the options available.
FC-CPE-1(config)#priority-list ?
________ default Set priority queue for unspecified datagrams
________ interface Set priorities for packets from a named interface
________ protocol priority queueing by protocol
________ queue-limit Set queue limits for priority queues
b. Note some of the protocol options available.
FC-CPE-1(config)#priority-list protocol ?
________ arp IP ARP
________ bridge Bridging
________ cdp Cisco Discovery Protocol
________ compressedtcp Compressed TCP (VJ)
________ http HTTP
________ ip IP
________ llc2 llc2
________ pad PAD links
________ pppoe PPP over Ethernet
________ snapshot Snapshot routing support
c. Note the IP protocol options available.
FC-CPE-1(config)#priority-list protocol ip ?
________ high
________ medium
________ normal
________ low
d. Note the HTTP protocol options available.
FC-CPE-1(config)#priority-list protocol http ?
________ high
________ medium
________ normal
________ low
e. Note the IP protocol high priority options available.
FC-CPE-1(config)#priority-list protocol ip high ?
________ fragments Prioritize fragmented IP packets
________ gt Prioritize packets greater than a specified size
________ list To specify an access list
________ lt Prioritize packets less than a specified size
________ tcp Prioritize TCP packets ‘to’ or ‘from’ the specified port
________ udp Prioritize UDP packets ‘to’ or ‘from’ the specified port
________ <cr>
f. Note the IP protocol high priority TCP options available.
FC-CPE-1(config)#priority-list protocol ip high tcp ?
________ <0-65535> Port number
________ domain Domain Name Service (53)
________ echo Echo (7)
________ ftp File Transfer Protocol (21)
________ ftp-data FTP data connections (20)
________ irc Internet Relay Chat (194)
________ nntp Network News Transport Protocol (119)
________ pop3 Post Office Protocol v3 (110)
________ smtp Simple Mail Transport Protocol(25)
________ telnet Telnet (23)
________ www World Wide Web (HTTP, 80)
Over 30 port/service options are available.
Step 3: Configure an example priority queue
From the global configuration mode, issue the following commands.
FC-CPE-1(config)#priority-list protocol http high
FC-CPE-1(config)#priority-list protocol ip normal tcp ftp
FC-CPE-1(config)#priority-list protocol ip medium tcp telnet
What do these commands establish?
Sebuah daftar prioritas (nomor “1″) yang menetapkan paket HTTP yang akan ditandai sebagai prioritas tinggi, paket FTP rendah prioritas, dan Telnet paket sebagai prioritas menengah.

Step 4: Assign the priority list to an interface
a. From the global configuration mode, issue the following commands to assign the priority list to interface serial 0/1/0.
FC-CPE-1(config)#int s0/1/0
FC-CPE-1(config-if)#priority-group 1
b. Confirm the priority list configuration. From the privileged EXEC mode, issue the show runningconfig
command.
Which statements in the configuration show that the priority list has been configured and applied correctly?
interface Serial0/1/0
ip address 10.10.0.2 255.255.255.252
priority-group 1
priority-list 1 protocol http high
priority-list 1 protocol ip normal tcp ftp
priority-list 1 protocol ip medium tcp telnet
c. Confirm that issuing the show queueing priority command from the privileged EXEC mode
produces the following output:
FC-CPE-1#show queueing priority
Current DLCI priority queue configuration:
Current priority queue configuration:
List Queue Args
1 high protocol http
1 normal protocol ip tcp port ftp
1 medium protocol ip tcp port telnet

Step 5: Examine the priority queues operation
a. On Host1, launch a web browser and enter the URL http://172.17.1.1 to access the web services configured on the server.
b. Use FTP to download a file. On Host1, launch a new web browser window and enter the URL ftp://172.17.1.1, or from the command line issue ftp 172.17.1.1
c. Download a large file from the server; for example, the Thunderbird setup program file.
d. From the privileged EXEC mode, issue the following command:
FC-CPE-1#show queueing interface s0/1/0
Output similar to this should be displayed:
Interface Serial0/1/0 queueing strategy: priority
Output queue utilization (queue/count)
high/94 medium/0 normal/106759 low/0
Note the packet count for each queue:
High __________ Medium __________ Normal __________ Low __________
e. Initiate a Telnet session from R2 to R1 and issue some show commands on R1.
f. Close the Telnet session.
g. Issue the following command from the R2 privileged EXEC mode:
FC-CPE-1#show queueing interface s0/1/0
Note the packet count for each queue:
High __________ Medium __________ Normal __________ Low __________
What is the significant difference when compared to the previous output form this command in Step 5d?
Antrian Menengah sekarang memiliki jumlah paket, ini adalah prioritas yang ditugaskan untuk paket Telnet.

Step 6: Determine the priority queue requirements for the case study
a. Using the FilmCompany case study, what would you expect the priority queue requirements to be?
b. Discuss and compare your priorities with other students.
c. Amend your priority list statements to include traffic associated with the proposed network upgrade.

Step 7: Clean up
Erase the configurations and reload the routers and switches. Disconnect and store the cabling. For PC hosts that are normally connected to other networks (such as the school LAN or to the Internet), reconnect the appropriate cabling and restore the TCP/IP settings.
Challenge
The following privileged EXEC command displays the contents of packets inside a queue for a particular
interface:
show queue interface-type interface-number
However, in this lab, it is not likely that sufficient data traffic was generated at one time for the interface
queues to hold packets long enough to be inspected. Discuss how a network has to be load tested to ensure that all traffic priorities are met.

Lab 4.2.3.2 Designing and Applying an IP Addressing Scheme


Step 1: Cable the network
  1. Connect Host1 to Switch1 port Fa0/2, using a straight-through Ethernet cable.
  2. Connect Host2 to Switch2 port Fa0/2, using a straight-through Ethernet cable.
  3. Connect Switch1 port Fa0/1 to Router1 port Fa0/0, using a straight-through Ethernet cable.
  4. Connect Switch2 port Fa0/1 to Router1 port Fa0/1, using a straight-through Ethernet cable.
Step 2: Configure the router
  1. Establish a terminal emulation session from either host to Router1.
  2. Configure the router hostname, passwords, interface IP addresses, and subnet mask. Also configure RIP as the routing protocol.
  3. Save the configuration.
Step 3: Configure the switches
  1. Establish a terminal emulation session to Switch1 from Host1.
  2. Configure the switch hostname, passwords, interface VLAN 1 IP address, subnet mask, and default gateway on Switch1.
  3. Save the configuration.
  4. Establish a terminal emulation session to Switch2 from Host2.
  5. Configure the switch hostname, passwords, interface VLAN 1 IP address, subnet mask, and default
  6. gateway on Switch2.
  7. Save the configuration.
Step 4: Configure the hosts
  1. Configure Host1 using the IP address, subnet mask, and default gateway from the table.
  2. Configure Host2 using the IP address, subnet mask, and default gateway from the table.
Step 5: Verify connectivity
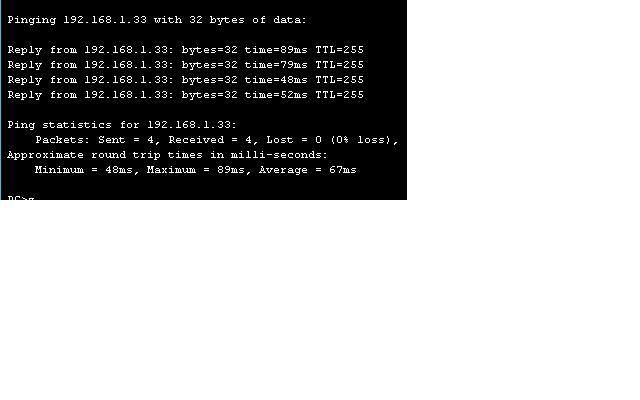
To verify that the network is set up successfully, ping from Host 1 to Host 2.
Was the ping successful?
Jawaban: Ya, saya sukses membuat jaringannya di pakettracet.
If the ping is not successful, verify the connections and configurations again. Check to ensure that all cables are correct and that connections are seated.

Step 6: Reflection
Subnetting allows the addresses in a network range to be split into smaller groups. This lab split the total
number of addresses, 256, into smaller groups of equal size.
How many address are in each subnet?
Jawaban : 32
How may total subnets were created?
Jawaban :  8
The subnet mask is 255.255.255.224. How many host bits were “borrowed” for subnetting?
Jawaban : 3
What is the total number of network and subnet bits in each address?
Jawaban : 27

Lab 4.2.3 Analyzing Network Traffic


Task 1: Design Network Access to FTP and Email Services

Step 1: FTP network considerations
File transfer traffic can put high-volume traffic onto the network. This traffic can have a greater effect on
throughput than interactive end-to-end connections. Although file transfers are throughput-intensive, they
typically have low response-time requirements. As part of the initial characterization of the network, it is important to identify the level of FTP traffic that will be generated. From this information, the network designers can decide on throughput and redundancy requirements.
a. List possible file transfer applications that would generate traffic on the FilmCompany network.
Document sharing
Video production file transfer
b. List these applications by priority based on response time.
1. Video production file transfer
2. Document sharing
c. List these applications by priority based on bandwidth requirements.
1. Video production file transfer
2. Document sharing

Step 2: Email network considerations
Although customers expect immediate access to their emails, they usually do not expect emails to have
network priority over files that they are sharing or updating. Emails are expected to be delivered reliably and accurately. Generally, emails are not throughput-intensive, except when there are enterprise-wide mail-outs or there is a denial of service attack.
List some email policies that could control the volume of email data and the bandwidth used.
Membatasi ukuran lampiran email
Membatasi nomor penerima pesan email
Memastikan spam terfilter sebelum menjangkau LAN

Step 3: Configure and connect the host PCs
a. Set the IP addresses for PC1 and PC2 as shown in the configuration table.
b. Establish a terminal session to router R1 from one of the PCs, and configure the interfaces and hostname as shown in the configuration table.


Task 2: Configure NBAR to Examine Network Traffic

Step 1: Enable NBAR Protocol Discovery
NBAR can determine which protocols and applications are currently running on a network. NBAR includes the Protocol Discovery feature, which identifies the application protocols operating on an interface so that appropriate QoS policies can be developed and applied. To enable Protocol Discovery to monitor selected protocols on a router interface, issue the following commands from the global configuration mode:
FC-CPE-1(config)#interface fastethernet 0/0
FC-CPE-1(config-if)#ip nbar protocol-discovery

Step 2: Confirm that Protocol Discovery is configured
From the privileged EXEC mode, issue the show running-config command and confirm that the following output appears under interface FastEthernet 0/0:
interface FastEthernet0/0
ip address 10.0.0.1 255.255.255.0
ip nbar protocol-discovery
If protocol-discovery is not confirmed, reissue the configuration commands for interface FastEthernet
0/0.


Task 3: Generate and Identify Network Traffic

Step 1: Generate FTP traffic
The Mozilla Thunderbird email client program will be downloaded from Discovery Server as an example of FTP.
a. On PC1, launch a web browser and enter the URL ftp://server.discovery.ccna,
Alternatively, from the command line, enter ftp server.discovery.ccna. If DNS is not configured the IP address 172.17.1.1 must be used instead of the domain name.
b. Locate the file thunderbird_setup.exe in the pub directory, download the file, and save it on PC1.
Repeat this step for PC2.

Step 2: Generate Email traffic
If the Thunderbird email client has been installed and email accounts set up on both PC1 and PC2, proceed to Step 2d. Otherwise, install and set up the email client on PC1 and PC2 as described in Steps 2a through 2c.
a. Install the Thunderbird email client on PC1 and PC2 by double-clicking the downloaded
thunderbird_setup.exe file and accepting the default settings.
b. When the installation has completed, launch the program.
c. Configure email account settings as shown in this table.
1) On the Tools menu, click Account Settings.
2)
3)
Complete the required Thunderbird Account Settings.
In the left pane of the Account Settings screen, click Server Settings and complete the
necessary details.
4) In the left pane, click Outgoing Server (SMTP) and complete the proper configuration for the
Outgoing Server (SMTP).
d. Send and receive two emails between accounts on each PC.

Step 3: Display the NBAR results
With Protocol Discovery enabled, any protocol traffic supported by NBAR, as well as the statistics associated with that protocol, can be discovered.
a. To display the traffic identified by NBAR, issue the show ip nbar protocol-discoverycommand from the privileged EXEC mode.
FC-CPE-1#show ip nbar protocol-discovery
b. List each protocol identified and the Input and Output information.
Output:
ftp 18 16
1295 1288
0 0
0 0
c. Although the data traffic in this lab may not be sufficient to generate values for the 5min Bit rate (bps) and 5min Max Bit Rate (bps) fields, consider and discuss how these values would be applied to designing an FTP and email network.
Dapat membantu menentukan rata-rata dan puncak kebutuhan bandwidth jaringan.

Step 4: Use NBAR to monitor other data traffic
NBAR can identify and monitor a range of network application traffic protocols.
From the privileged EXEC mode of the router, issue the command show ip nbar port-map and note the output displayed.
FC-CPE-1#show ip nbar port-map
List some protocols that you consider should be monitored and policies applied to.
Output
port-map bgp udp 179
port-map bgp tcp 179
port-map bittorrent tcp 6881 6882 6883 6884 6885 6886
6887 6888 6889
port-map citrix udp 1604
port-map citrix tcp 1494
port-map cuseeme udp 7648 7649 24032
port-map cuseeme tcp 7648 7649
port-map dhcp udp 67 68
port-map directconnect tcp 411 412 413
port-map dns udp 53
port-map dns tcp 53
port-map edonkey tcp 4662
port-map exchange tcp 135
port-map fasttrack tcp 1214
port-map finger tcp 79
port-map ftp tcp 21
port-map gnutella udp 6346 6347 6348
port-map gnutella tcp 6346 6347 6348 6349 6355 5634
port-map gopher udp 70
port-map gopher tcp 70
port-map h323 udp 1300 1718 1719 1720 11720
port-map h323 tcp 1300 1718 1719 1720 11000 – 11999
port-map http tcp 80
port-map imap udp 143 220
port-map imap tcp 143 220
port-map irc udp 194
port-map irc tcp 194
port-map kerberos udp 88 749
port-map kerberos tcp 88 749
port-map l2tp udp 1701
port-map ldap udp 389
port-map ldap tcp 389
port-map mgcp udp 2427 2727
port-map mgcp tcp 2427 2428 2727
port-map netbios udp 137 138
port-map netbios tcp 137 139
port-map netshow tcp 1755
port-map nfs udp 2049
port-map nfs tcp 2049
port-map nntp udp 119
port-map nntp tcp 119
port-map notes udp 1352
port-map notes tcp 1352
port-map novadigm udp 3460 3461 3462 3463 3464 3465
port-map novadigm tcp 3460 3461 3462 3463 3464 3465
port-map ntp udp 123
port-map ntp tcp 123
port-map pcanywhere udp 22 5632
port-map pcanywhere tcp 65301 5631
port-map pop3 udp 110
port-map pop3 tcp 110
port-map pptp tcp 1723
port-map printer udp 515
port-map printer tcp 515
port-map rcmd tcp 512 513 514
port-map rip udp 520
port-map rsvp udp 1698 1699
port-map rtsp tcp 554
port-map secure-ftp tcp 990
port-map secure-http tcp 443
port-map secure-imap udp 585 993
port-map secure-imap tcp 585 993
port-map secure-irc udp 994
port-map secure-irc tcp 994
port-map secure-ldap udp 636
port-map secure-ldap tcp 636
port-map secure-nntp udp 563
port-map secure-nntp tcp 563
port-map secure-pop3 udp 995
port-map secure-pop3 tcp 995
port-map secure-telnet tcp 992
port-map sip udp 5060
port-map sip tcp 5060
port-map skinny tcp 2000 2001 2002
port-map smtp tcp 25
port-map snmp udp 161 162
port-map snmp tcp 161 162
port-map socks tcp 1080
port-map sqlnet tcp 1521
port-map sqlserver tcp 1433
port-map ssh tcp 22
port-map streamwork udp 1558
port-map sunrpc udp 111
port-map sunrpc tcp 111
port-map syslog udp 514
port-map telnet tcp 23
port-map tftp udp 69
port-map vdolive tcp 7000
port-map winmx tcp 6699
port-map xwindows tcp 6000 6001 6002 6003

Step 5: Clean up
Erase the configurations and reload the routers and switches. Disconnect and store the cabling. For PC hosts that are normally connected to other networks (such as the school LAN or to the Internet), reconnect the appropriate cabling and restore the TCP/IP settings
Challenge
This lab considered only the volume of FTP and email data traffic and its impact on network design. Reliable access to servers is also important. In the space below, sketch a revised topology for this lab that would provide redundancy for these services.